Some would say that dreaming is a form of planning. When we allow ourselves to dream about where we would like to be, what we would like to be doing, or what we would like to wear, we are actually on our way to developing a plan that will allow us to achieve those things. Boredom can be an enemy of happiness. When our current situation no longer entertains us, it is time to dream about new adventures and in doing so sketch a mental plan to allow changes in our lives.

And this is where summer comes in, isn't it? Some say that Summer is when life begins all over again. The spirited tones of green of the landscape along with the calid air, spark inspiration and creativity. This warm and lazy season extends us an invitation to dream and plan. As such, Summer is a time for wandering as well as a time for wondering.
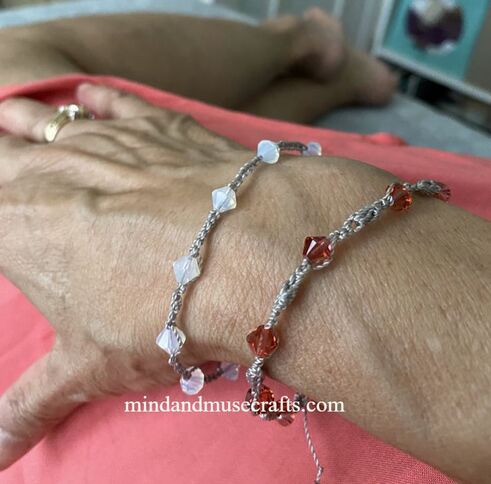
Today, I would like to share with you where my wandering, dreaming and planning has taken my crafting this summer. The summer months here in the Caribbean can be detrimental to ones desire to craft and create with the thicker yarns, so in the summer I turn to cottons and linens, crop tops and jewelry. This month I would like to share with you ideas for creating crochet bracelets; in particular, crochet bracelets with beads.
Note: While making your bracelet, keep your tension tight.
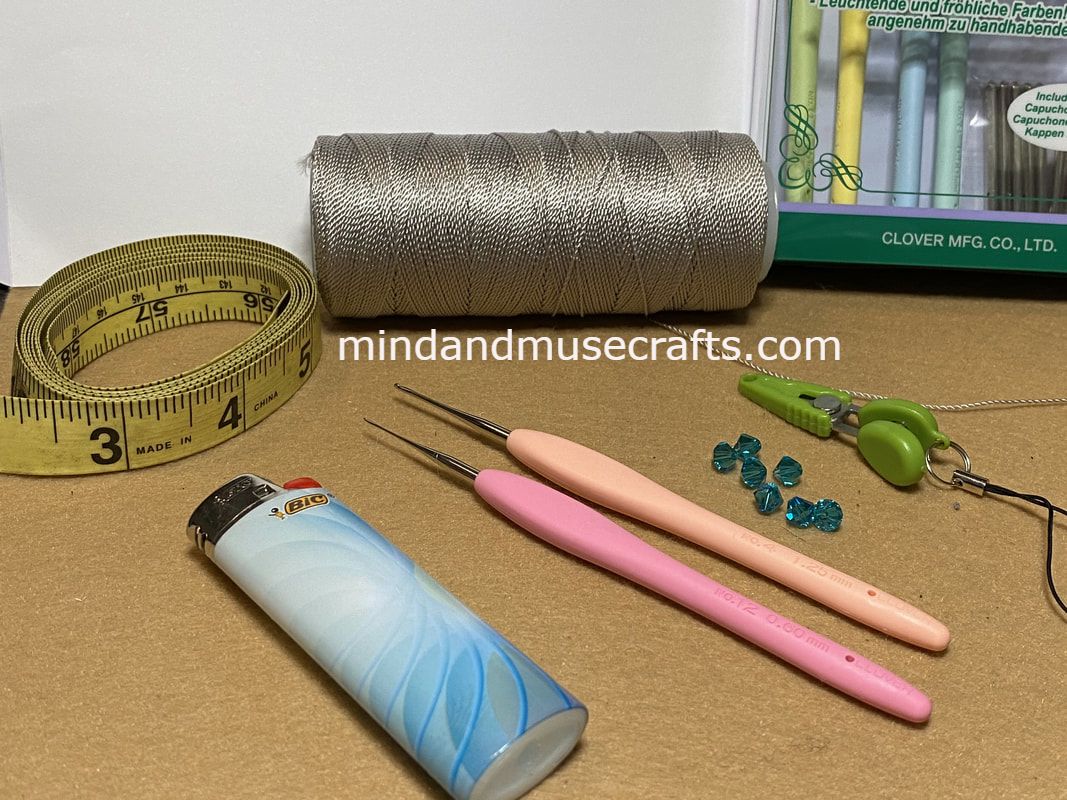
To make this crochet bracelet you will need:
- Omega 100% nylon thread #2 – in the color of your preference - I used silver.
-1.25 mm or 1.5 crochet hook (depending on how tight you crochet - I used a 1.25 mm hook.)
- 6 mm swarovski bicones in the color of your choice (or an assortment of different colors). The number of beads will depend on the length of your bracelet. I made my bracelet 7 inches long and I used 9 beads.
- ruler or measuring tape
- thread clippers or scissors
- lighter - This is a common tool for burning the ends of the nylon thread to prevent fraying.
INSTRUCTIONS:
1. With the 1.25 mm hook, leave a tail of about 4 inches and make a slip knot. Ch 1. Leave the loop of your chain a bit long.
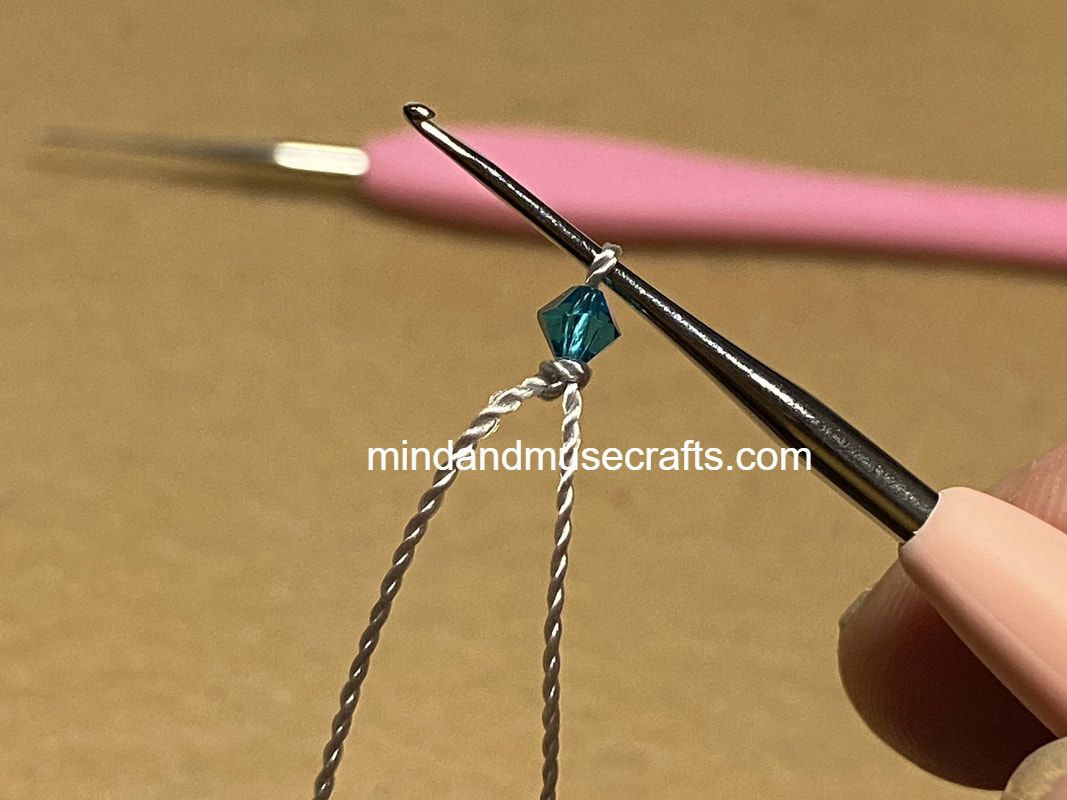
2. Using your 0.6 mm hook pick up a bead by inserting the 0.6 mm hook through the hole of the bead. Now pick up the loop of your chain and pull the loop through the bead.
1. With the 1.25 mm hook, leave a tail of about 4 inches and make a slip knot. Ch 1. Leave the loop of your chain a bit long.
2. Using your 0.6 mm hook pick up a bead by inserting the 0.6 mm hook through the hole of the bead. Now pick up the loop of your chain and pull the loop through the bead.
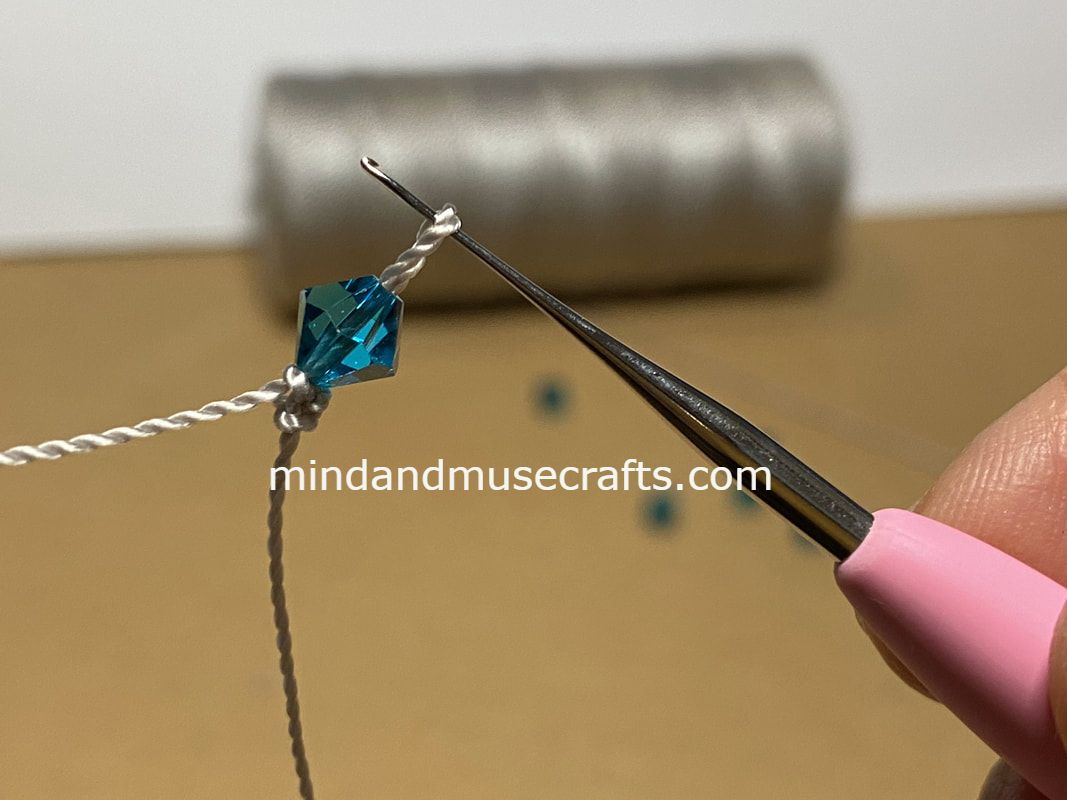
3. Change back to the 1.25 mm hook. Tighten the loop by pulling on your working thread to bring the loop down closer to your bead. Complete the chain stitch by yarning over and pulling the thread through the beaded loop. Chain 5.
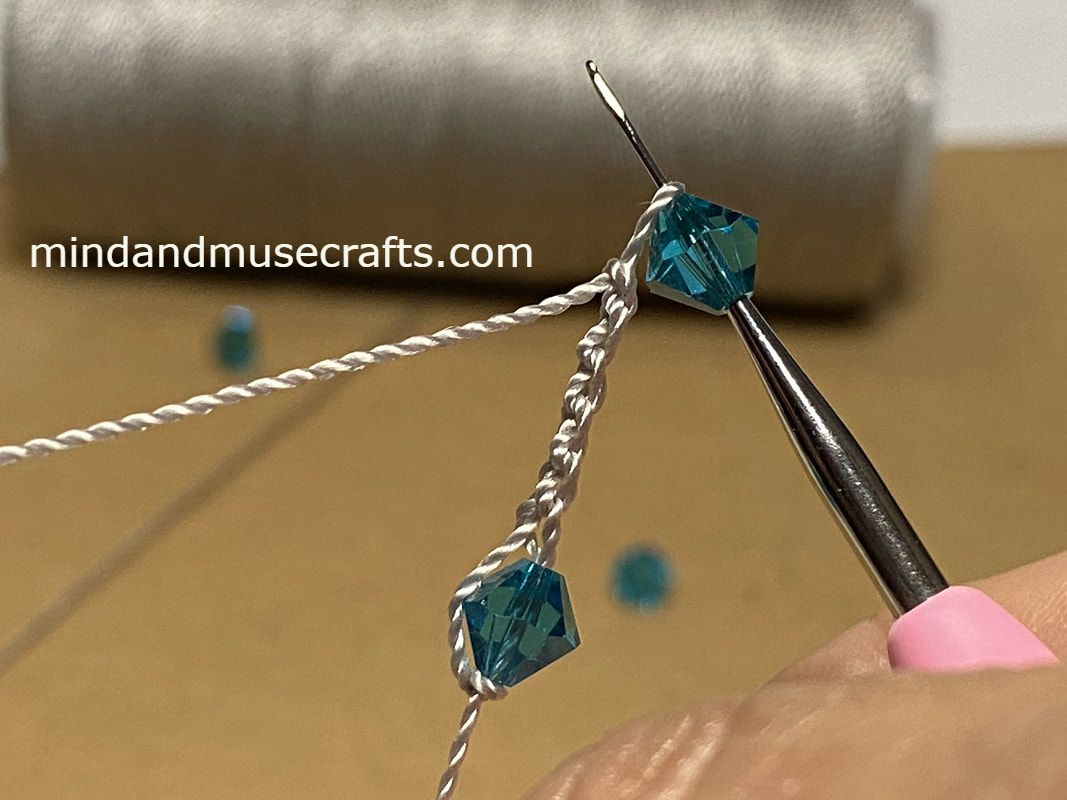
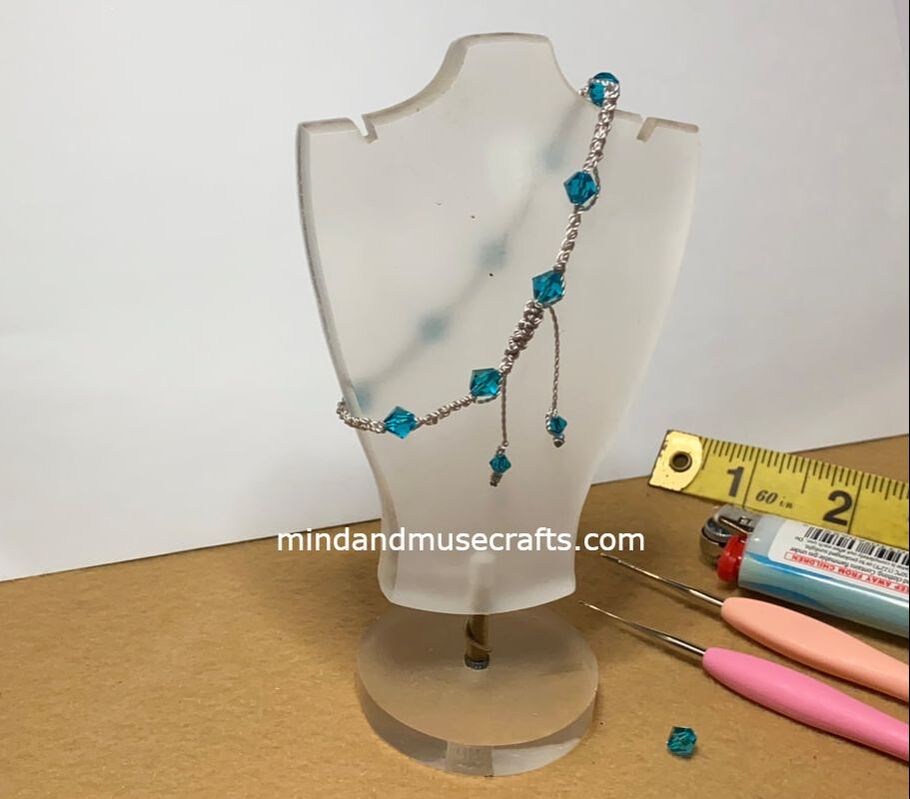
4. Repeat steps 2 and 3 until you have added the amount of beads needed to create a bracelet of the desired length. Remember to leave the loop of your chain a bit long each time you want to add another bead. After the last bead has been added, chain 1 instead of five.
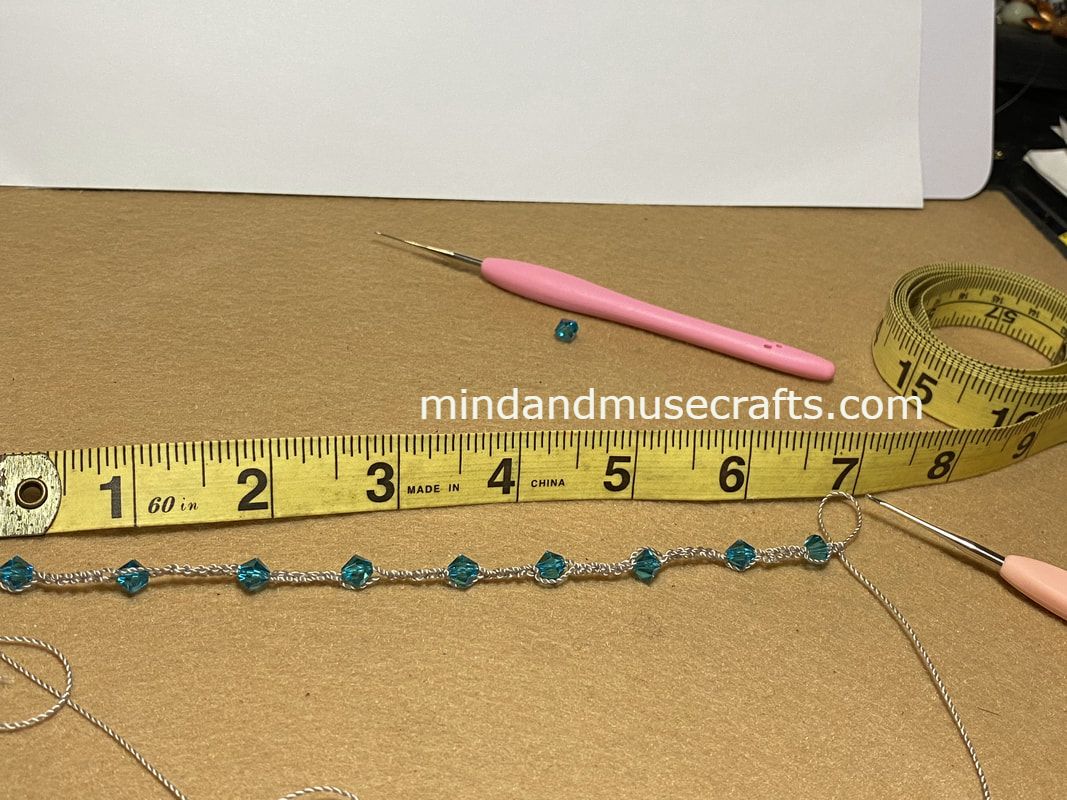
In the above image you can see that I have added 9 beads and my bracelet is now a bit more than 6.5 inches because I want my final bracelet to be 7 inches in length. Keep in mind that adding a metal closure or an adjustable square knot at the end of your bracelet will also add a bit of length.
5. Fasten off leaving a 4 inch tail.
6. If you prefer to tie your bracelet around your wrist, finish off each end of the bracelet by holding the thread up to the flame of a lighter so the ends melt and don't fray.
You could also use the tails of your bracelet to attach a metal clasp, such as a lobster claw, a spring ring or hook and eye. You can probably find low cost clasps for bracelets at you local craft store or you can search online, for example here.
Another option is to follow a tutorial on YouTube for making an adjustable square knot like I did. There are many such tutorials available. I followed this one: youtu.be/z5PmJJzLeGs?t=247 .
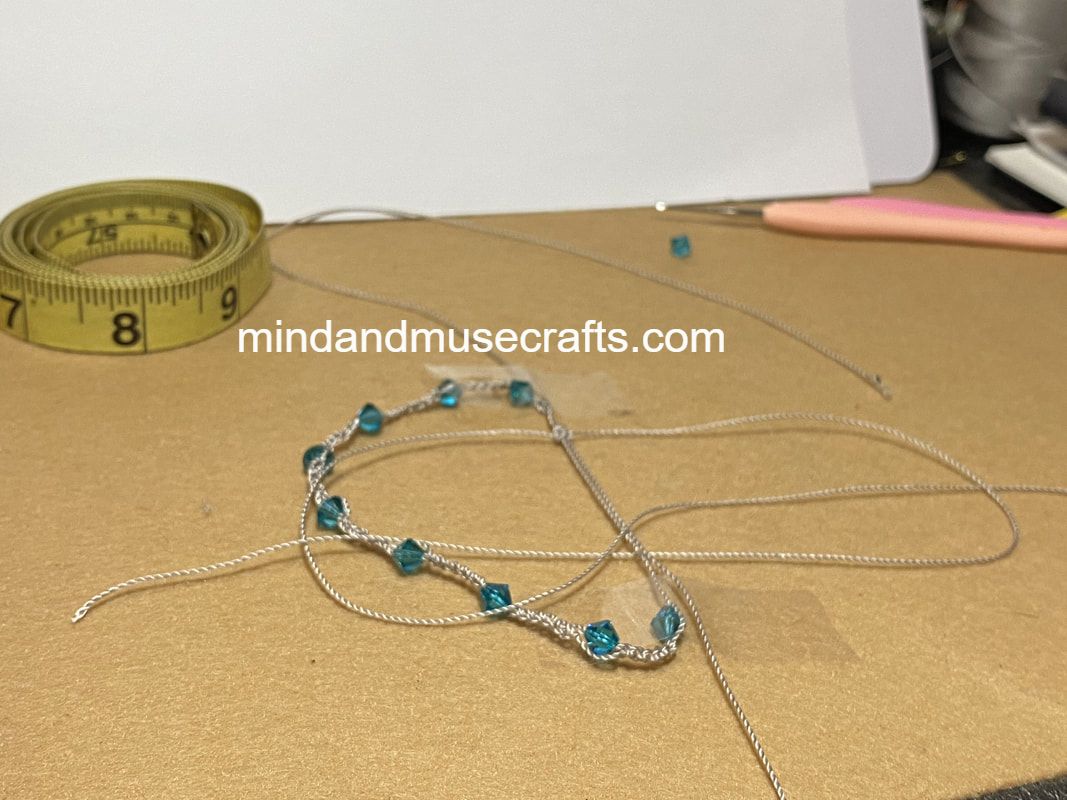
To prepare my setup, I form a circle with the bracelet and use a third thread (maybe 8 or 10 inches long) to create a knot around the two bracelet ends. I usually tape my bracelet ends together at the top and at the bottom to keep them straight and make sure I am working around both strands with the third thread. After your bracelet is set up this way... follow the YouTube tutorial to complete the adjustable square knot.
5. Fasten off leaving a 4 inch tail.
6. If you prefer to tie your bracelet around your wrist, finish off each end of the bracelet by holding the thread up to the flame of a lighter so the ends melt and don't fray.
You could also use the tails of your bracelet to attach a metal clasp, such as a lobster claw, a spring ring or hook and eye. You can probably find low cost clasps for bracelets at you local craft store or you can search online, for example here.
Another option is to follow a tutorial on YouTube for making an adjustable square knot like I did. There are many such tutorials available. I followed this one: youtu.be/z5PmJJzLeGs?t=247 .
To prepare my setup, I form a circle with the bracelet and use a third thread (maybe 8 or 10 inches long) to create a knot around the two bracelet ends. I usually tape my bracelet ends together at the top and at the bottom to keep them straight and make sure I am working around both strands with the third thread. After your bracelet is set up this way... follow the YouTube tutorial to complete the adjustable square knot.
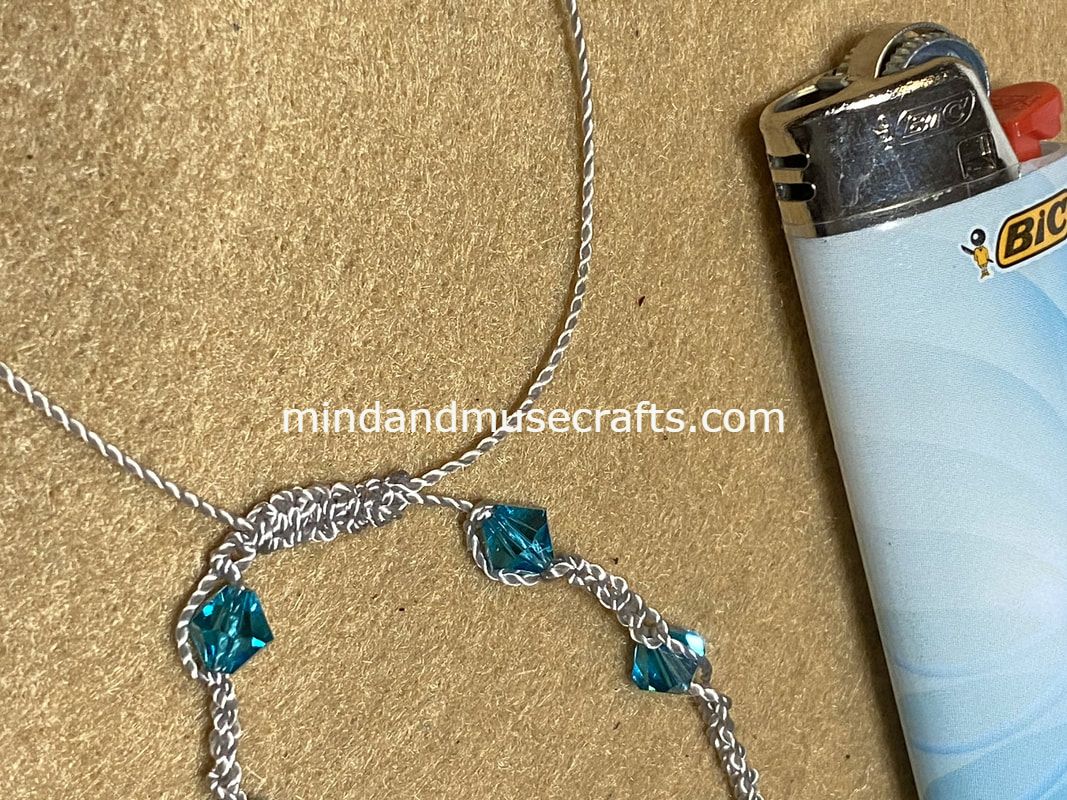
7. After you have made your square not, you may add smaller beads to the ends of your strands that will be used to pull and adjust the bracelet to your wrist size. This will prevent the end strands from sliding out of the knot.
I usually add a smaller bicone to each bracelet end (3 mm).
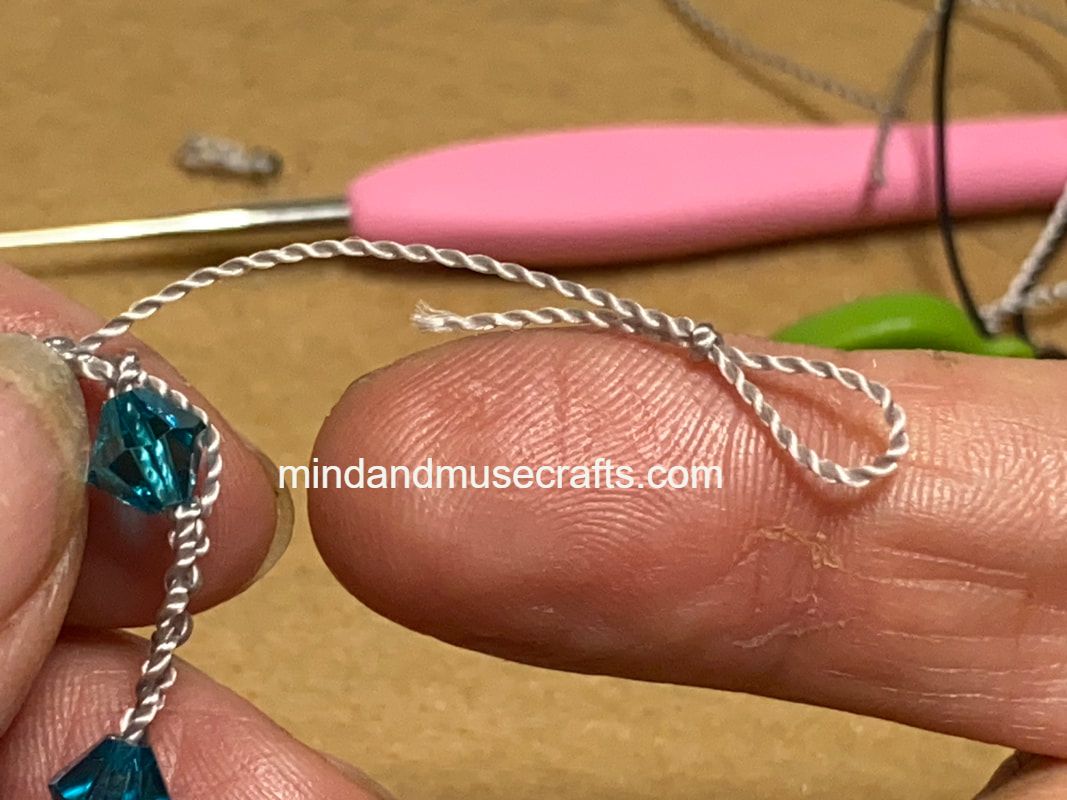
To do so, start by taking the long tail of one of the bracelet ends and making a slip knot.
(Note: Leave enough tail to complete the chain around the bead and fasten off... unlike the way I did it in this picture. But you get the idea, I hope.)
I usually add a smaller bicone to each bracelet end (3 mm).
To do so, start by taking the long tail of one of the bracelet ends and making a slip knot.
(Note: Leave enough tail to complete the chain around the bead and fasten off... unlike the way I did it in this picture. But you get the idea, I hope.)
Place the 0.6 mm hook through the hole in the 3 mm bead and pull your loop through. (It will be tighter than before.)
Switch to the 1.25 mm hook and use what is left of the tail to complete the chain stitch around the bead and fasten off.
Then take the lighter and bring the flame up to the end of the thread to melt it a bit.
Then take the lighter and bring the flame up to the end of the thread to melt it a bit.

Do the same to the other side and you will have completed one bracelet! You can enjoy this one yourself and make lots more for friends and family.
 RSS Feed
