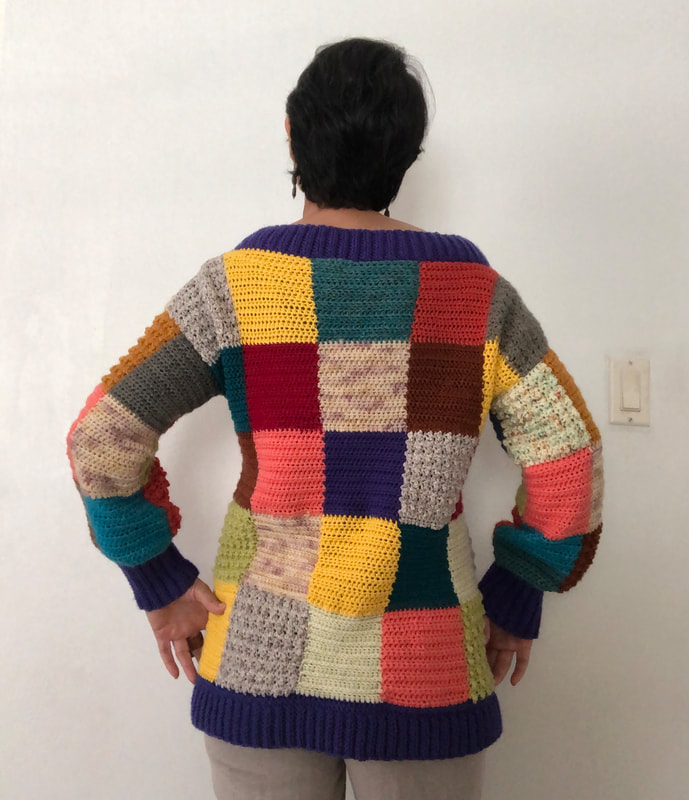
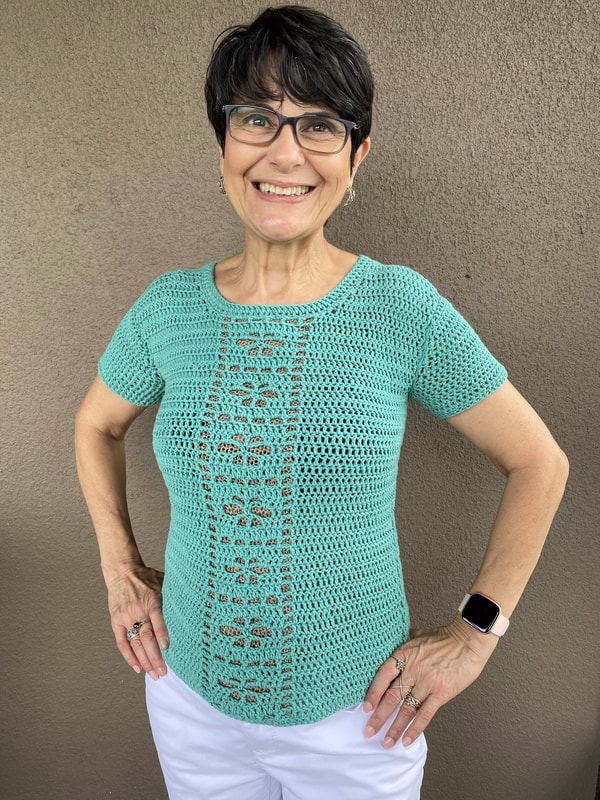
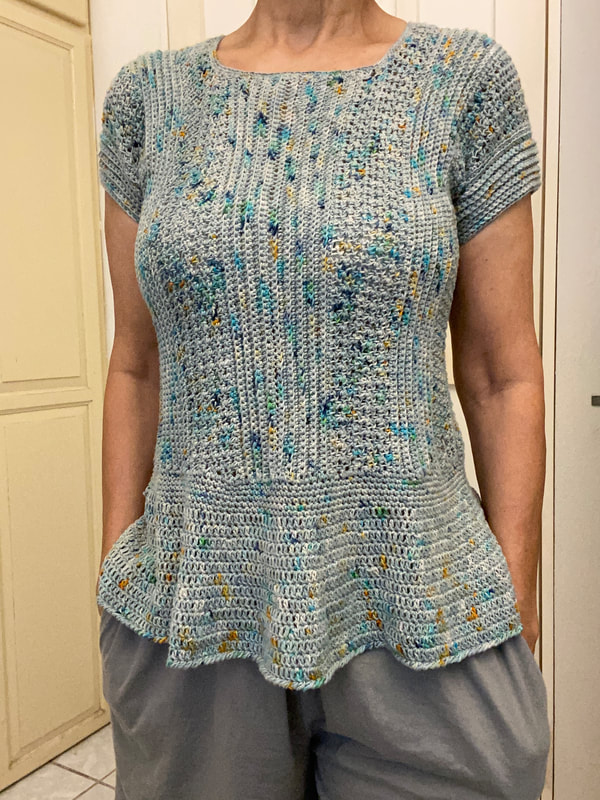
I am by no means a knitwear designer. If you have been coming around here for a while you know that I can take a written pattern, make some simple modifications and end up with a decent looking result. I've shared a lot of my attempts at doing that in previous posts. Below are some examples. Interested in the original patterns? Hover over the images to see the links if you like. Then, read on about how I made an oversized Snoopy Sweater!!
Okay. So, we have established that I can make adjustments to a knitwear pattern. However, the initial stages of creating a design such as seeing it in your head before you even begin, or deciding which stitch pattern to use, or calculating the number of stitches needed to reach a specific measurement, or determining where, when and how to complete the decreases... all the hard work was already completed by the designer.
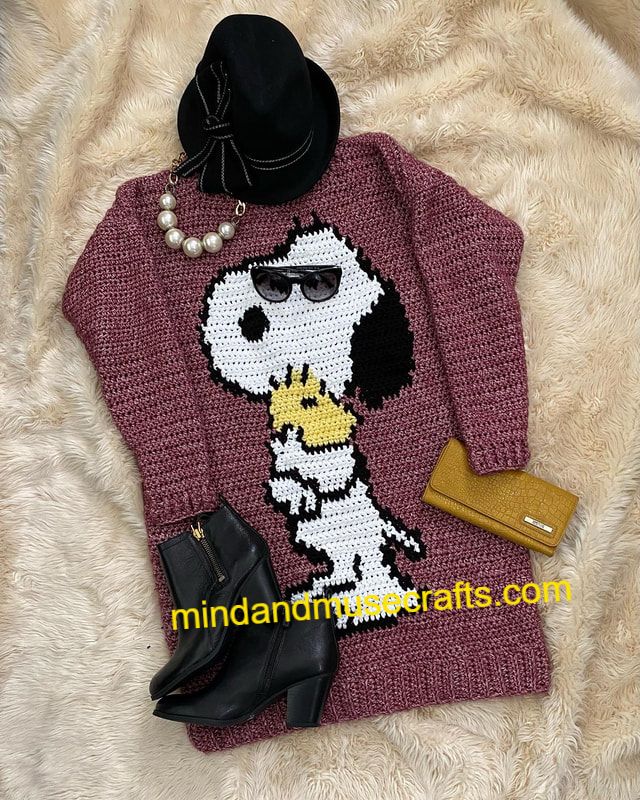
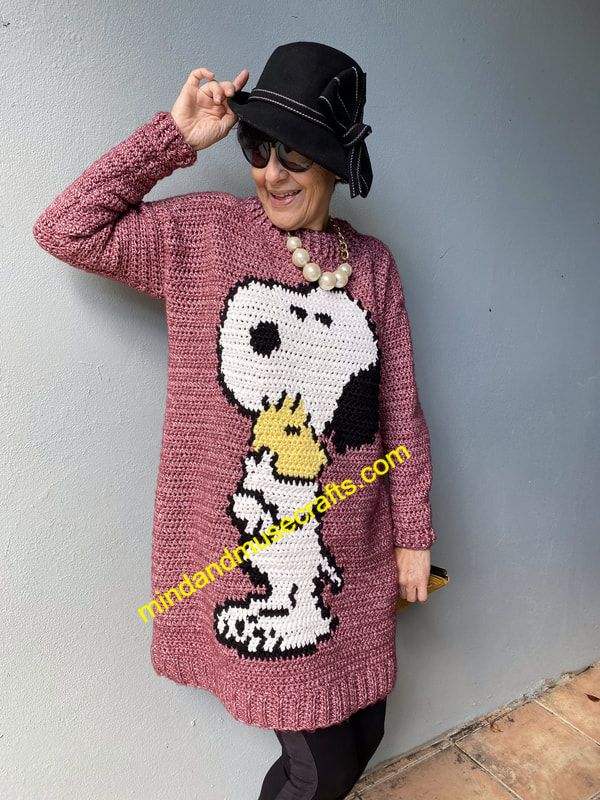
Having clarified that, I would also like to say that I always welcome learning new skills. Also, I would like to believe that I can do anything if I give it my very best shot. So recently, I was obsessed with the idea of making an oversized sweater with an image of Snoopy, a character from the Peanuts comic, originally written by Charles Schulz. No idea why this idea captivated me except for the fact that I have been a Snoopy fan for as far back as I can remember. Nevertheless, truth be told, I live in the tropics and really don't have much use for this type of garment. But, as the saying goes, "a makers gonna make", so that's what I did.
Having clarified that, I would also like to say that I always welcome learning new skills. Also, I would like to believe that I can do anything if I give it my very best shot. So recently, I was obsessed with the idea of making an oversized sweater with an image of Snoopy, a character from the Peanuts comic, originally written by Charles Schulz. No idea why this idea captivated me except for the fact that I have been a Snoopy fan for as far back as I can remember. Nevertheless, truth be told, I live in the tropics and really don't have much use for this type of garment. But, as the saying goes, "a makers gonna make", so that's what I did.
How I made an oversized Snoopy Sweater
I decided to share my experiences making this sweater, thinking that maybe it might help someone out there do the same. I can't give you a pattern at the moment, but I can describe my process.
When I was completing my master's degree, the mentor of our research group would have us study a published research paper and try to repeat the experimentation to obtain similar results. It was believed that by doing so we would develop sound research skills. So, I decided to apply this same technique to learning how to design a loose-fitting sweater.
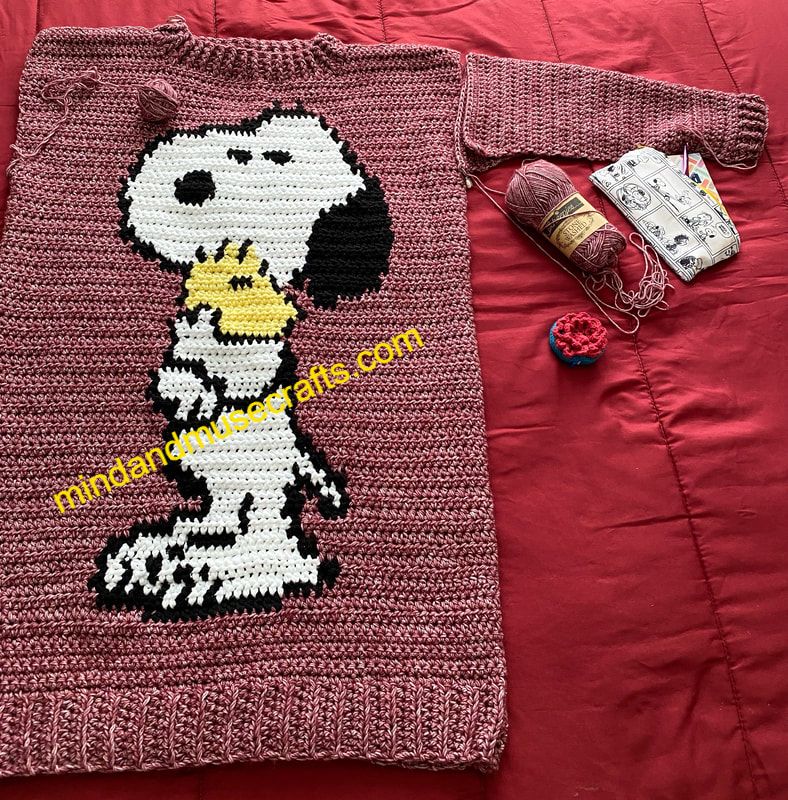
I began by choosing a pattern from my archive that made a sweater similar to the outcome I wanted. I made 4-inch by 4-inch swatches in single crochet with different hook sizes until I obtained the designer's gauge. I used Scheepjes Cotton/Acrylic sport weight yarn held double and a 7 mm hook. Then, I referred to the pattern I was using as a base to determine how long to make my bottom ribbing (single crochets in the back loop over 8 stitches) and then I turned 90 degrees to begin the back panel, picking up the number of stitches suggested by the designer. For the back, all I needed to do was to complete rows (back and forth) in single crochet, all the same length, until I reached the desired length of the sweater (This ended up being 106 rows! Read on to find out why.)
When I was completing my master's degree, the mentor of our research group would have us study a published research paper and try to repeat the experimentation to obtain similar results. It was believed that by doing so we would develop sound research skills. So, I decided to apply this same technique to learning how to design a loose-fitting sweater.
I began by choosing a pattern from my archive that made a sweater similar to the outcome I wanted. I made 4-inch by 4-inch swatches in single crochet with different hook sizes until I obtained the designer's gauge. I used Scheepjes Cotton/Acrylic sport weight yarn held double and a 7 mm hook. Then, I referred to the pattern I was using as a base to determine how long to make my bottom ribbing (single crochets in the back loop over 8 stitches) and then I turned 90 degrees to begin the back panel, picking up the number of stitches suggested by the designer. For the back, all I needed to do was to complete rows (back and forth) in single crochet, all the same length, until I reached the desired length of the sweater (This ended up being 106 rows! Read on to find out why.)

NOTE: I talk in details about my making process in several episodes of my podcast:
The Mind and Muse Crafts Podcast//Episode 2021-17: And so it ends... (12/28/2021)
The Mind and Muse Crafts Podcast// Episode 2022-1 This grateful crafter
The Mind and Muse Crafts Podcast//Episode 2021-17: And so it ends... (12/28/2021)
The Mind and Muse Crafts Podcast// Episode 2022-1 This grateful crafter
After completing the back, I went on to work with the front. Since the front had colorwork, I did several swatches to see what stitch and hook size gave me a cleaner look. For the front I used Scheepjes Stonewashed Cotton/Acrylic sport weight yarn held double (same as the back), Lion Brands "Feels like butta" and "Basic Stitch Anti-pilling" yarn (all held double), as well as an 8 mm hook.
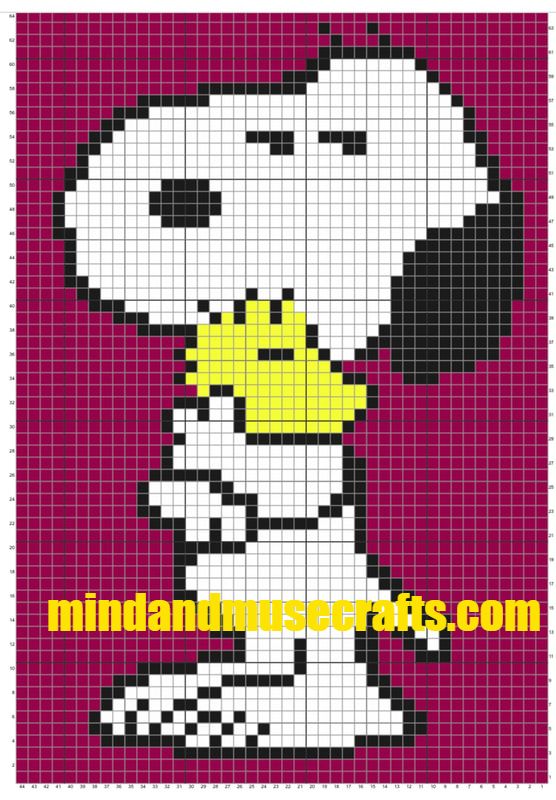
For the Snoopy design, I imported a clipart found on the Internet into Stitch Fiddle (an online crochet, knitting and cross stitch pattern maker that can be found at Stitch Fiddle | Free online knitting and cross stitch stitch chart pattern editor )
This software has free and paid-for versions and will help you create the colorwork chart from an imported image. The paid-for version also allows you to create row by row written instructions for your charts and to save your charts. My chart had 44 stitches across and 64 rows, but, my front panel had 64 stitches in total, so I always made 10 half-double crochet stitches before starting a row of the chart and 10 stitches after completing a row of the chart.
Since my colorwork chart was larger than the colorwork chart found in my base pattern, and I was using half-double crochets for my front panel instead of single crochet stitches, the front panel turned out quite a bit larger than the panel described in the base pattern. In consequence, I needed to determine the neck and armhole size based on my body measurements. In addition, I had to adjust my back after the front was finished so both pieces would be the same length. (Which explains why I had to make over 100 rows on the back to make it as long as my front!). In the end, it worked out, since I was basically joining two rectangles at the top and the sides, leaving space for the neck and arm openings.

After joining the front and back panels, I needed to complete the neckline. I decided to use 4 rows of alternating double-crochet front post and back post stitches, worked in the round. That gave me a nice tall neckline.
Finally, it came time to add the sleeves. I decided to make them separate from the body by creating a trapezoidal shaped piece that at one end fit around my wrist and at the other had the same width as my armhole circumference. So, using a 7mm hook, I began by making 24 foundation double-crochet stitches. Then, working back and forth, I made three rows of alternating front-post and back-post double-crochet stitches. I then worked (back and forth) alternating rows of single crochet and half-double crochets, and increasing two stitches on every single crochet row until I reached my desired sleeve length and had the correct sleeve width. Finally, the trapezoid was folded in half and seamed before seaming the sleeve to the armhole.
In summary, I feel that too little planning and too much trial and error went into the making of this sweater. Still, I can say that I had a lot of fun! Though it is true that the sweater is quite larger and longer than I had wanted it, it is still a stunning sweater. While making this garment, I learned a lot about the importance of planning out a project and checking and rechecking your numbers and calculations prior to starting a project. Completing this sweater also lead me to believe that crochet colorwork comes out neater if all the yarn is the same blend and brand. In addition, I confirmed that using stitches that are equal in size definitely makes calculating your garment measurements easier.
Would you ever try to make a crochet sweater without a pattern? I'm thinking that I could give it a second try!
Would you ever try to make a crochet sweater without a pattern? I'm thinking that I could give it a second try!
 RSS Feed
